
You read our blog. Which means that you may know about our unending love for the videogame Borderlands 2 (and Borderlands, before it). Well, Ultimate Vault Hunters that we are, we made a DIY Claptrap trash can. Don’t play Borderlands? Read on anyway, and we’ll explain.

THIS is Claptrap (video link). He’s a robot, good at beat-boxing, fancies us his minions, and sends us on missions throughout the Borderlands world of Pandora. He’s pretty useless, but thinks of himself as the hero (and us his side-kicks). Oh, and he’s cute, says Allons-y, and likes breakdancing, thus we like him.
We wanted something Borderlands-themed AND useful for the house, and seeing a step-open trash bin on one of our supply runs lit the ol’ inspiration lightbulb. This project took a couple of days (spread out over a couple of weeks), but in the end we got our own DIY Borderlands Claptrap, so we’re happy. Bonus points for him being a functional trash bin for our geeky home office.
What you’ll need (yes, a lot of supplies. At the bottom of the post we’ll give tips on how to simplify this):
–Step-On Trash Can
–LED Puck Light
–8” Solid Rubber Tire
-PVC pipes and attachments
-Cardboard
–Coaxial cable (you could use painted rope/bungee instead)
-Plastic vent cover
–Metallic Spray Paint
-Acrylic paint
-Painters tape
-Small hinges
-Eyebolts with washers and nuts
–Extending antenna
–E-6000 / Goop type glue
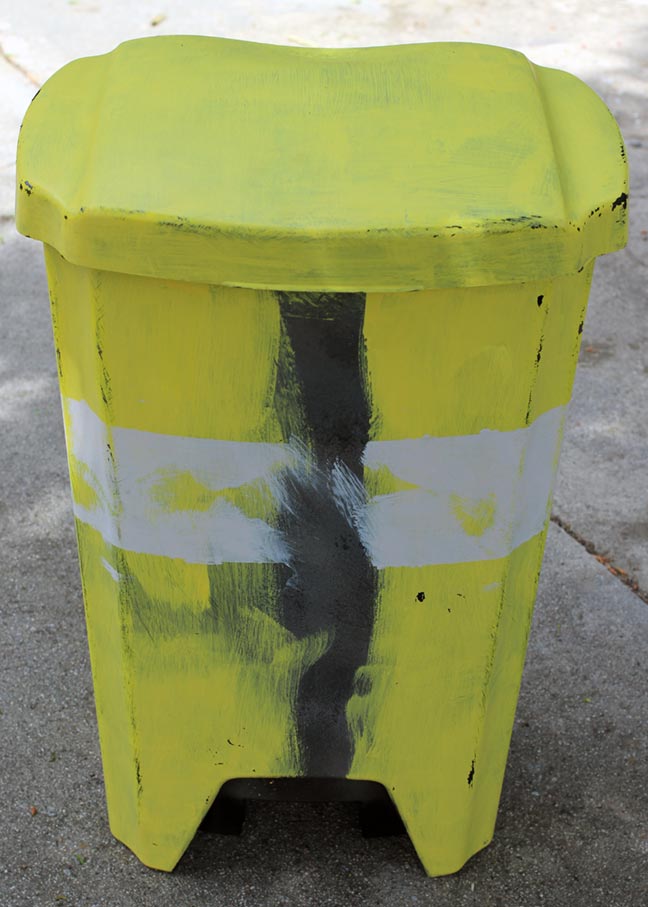
In the game, Claptrap has been beat up and kicked around and some of his paint has been scratched off. So we first spray-painted the trash bin with metallic spray paint. Don’t be precise, and this step is optional. The reason for the metallic paint being that after we painted on the yellow and white acrylic paint, we sandpapered some of it away and the “metal” peeked through. Here’s the white/yellow paint (we didn’t do the middle part since we knew it would be covered):
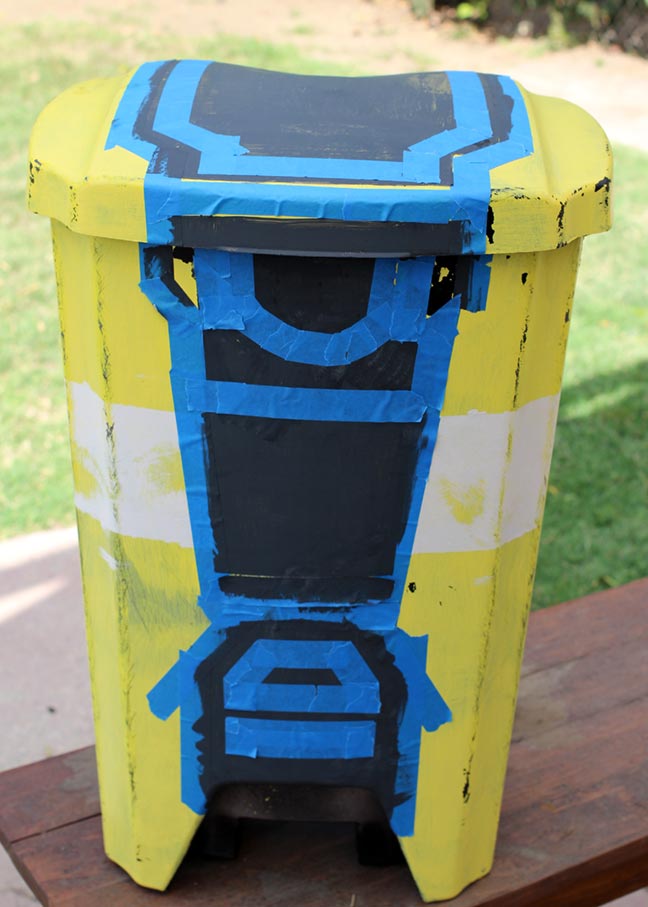
Using painters tape, we marked off and painted the different parts of his chassis.
We drilled holes for the arms and the wheel attachment and disassembled the step-open lever (easier than it sounds).
Claptrap’s arms are made out of PVC plumbing pipe and attachments, which we found for cheap at the Habitat-for-Humanity ReStore (<3). Home Depot/Lowes are also good for this, and the PVC is only a few bucks. His hands are made out of cardboard, glued to a pipe attachment. The (optional) forearm wire is a cut-up coaxial cable. We spray painted it all the dark metallic color:
Once dry, we assembled the arms (shown below pre-assembly). The cable was cut and taped to the elbows and wrists, and his hands glued to the end of the arm.
A small piece of PVC pipe attaches the arm to the shoulder and holds poses pretty well.
We got the LED puck light at Harbor Freight (another <3), it rotates and pivots in the socket, mimicking an eye. That was painted blue and glued to the body.

His mouth grill is the underside of a random plastic container which we cut/painted/glued. A piece of cardboard would work instead. The warning sign and blue meter are painted cardboard. The top of his “head” is a plastic vent cover, spray painted and glued to the lid.
Claptrap’s eyebrow and arm/ear flaps are scrap pieces of cardboard (painted black). We attached them with small hinges, glued on with E600. That other little decorative piece shown below is also painted cardboard.
We attached the wheel with eyebolts/bolts/nuts, using the holes we drilled earlier. Finally, the antenna was attached to the lid by making a small incision and pushing the end through.
[High five] “You’ve earned it!”.
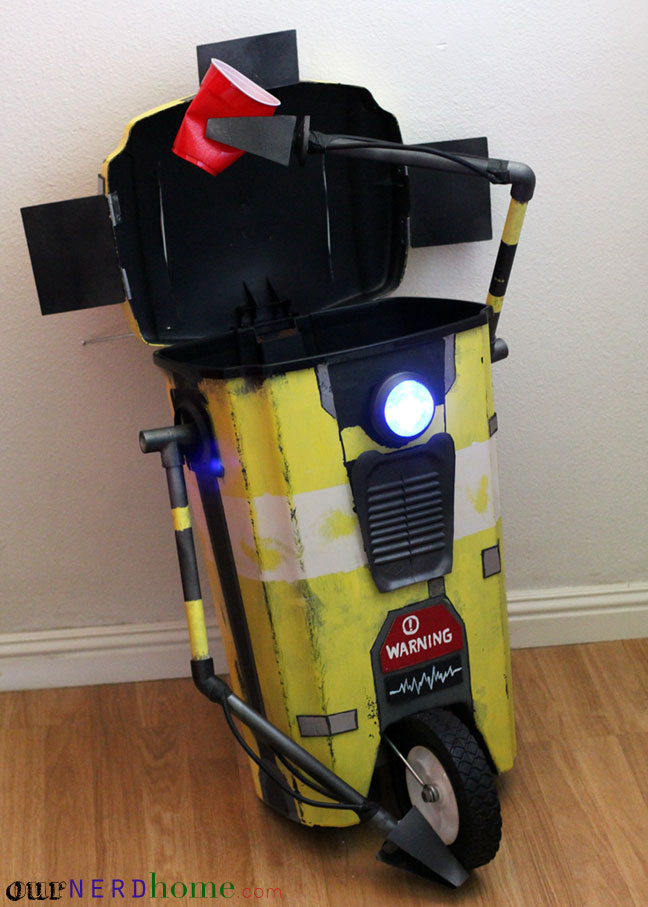
And…. OPEN!!
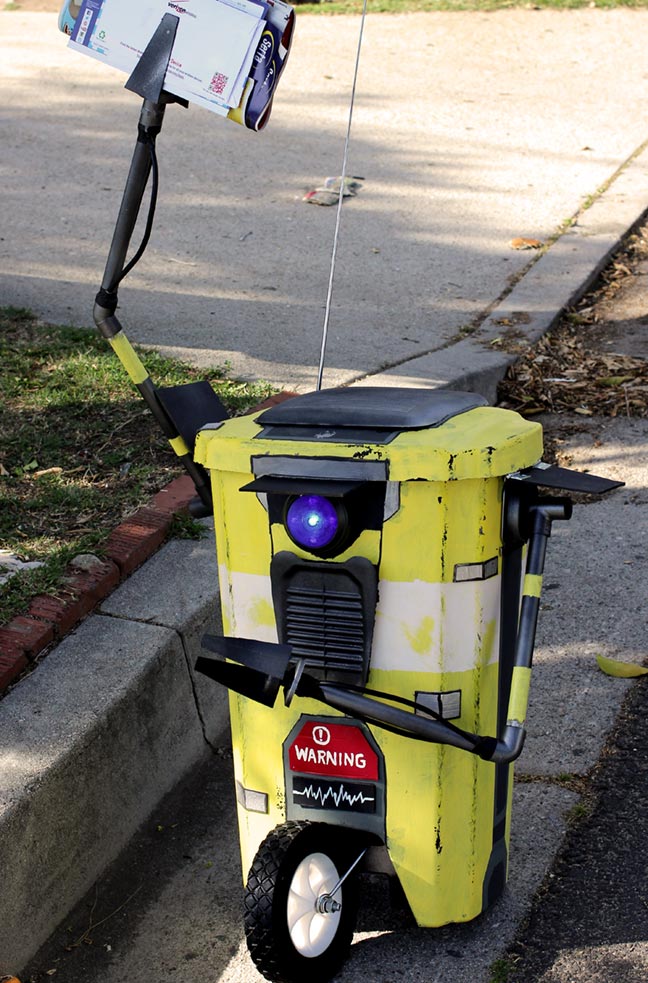
Getting the mail
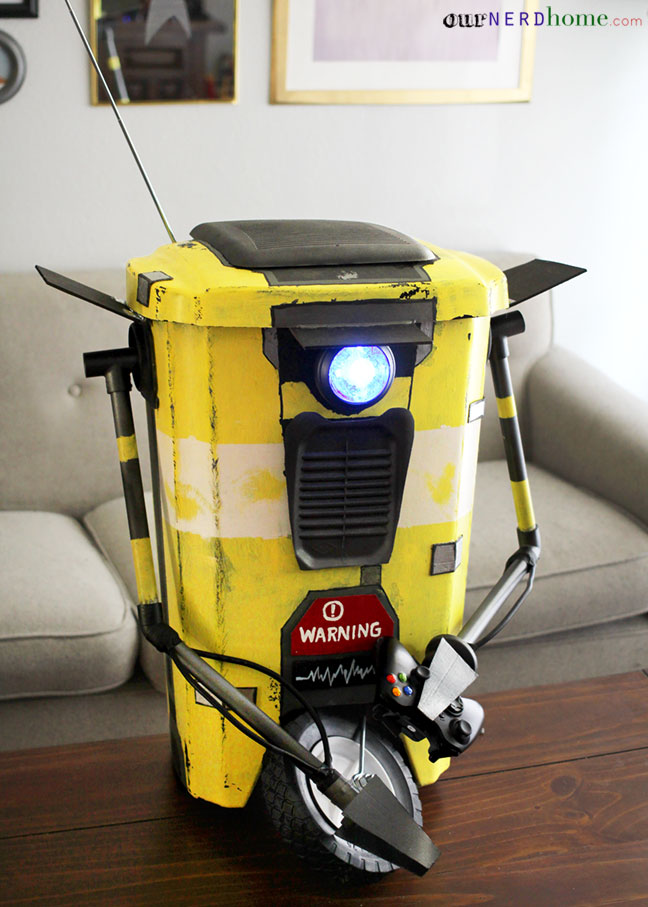
This DIY Claptrap’s only two functions are looking cool and being an actual trash receptacle, but he does those well! We may get a cheap little voice box for him as well so he can annoy us with his witticisms as we try to throw things away. We spent about $40 on making him (we already had the spray paint, paint, cardboard, tools). Worth it.
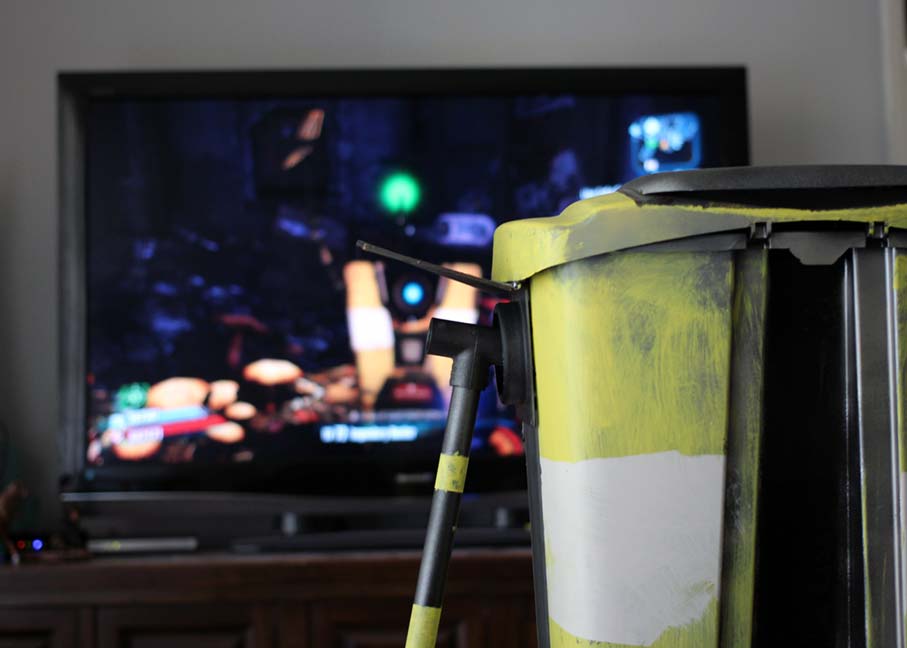
Who’s that handsome devil?
If you want to go a MUCH easier route (though far less detailed), just get the trashcan, LED light, and paint. When Claptrap rests in the game, he tucks his arms and wheel in, so you can just go ahead and say you made a sleeping-Claptrap. 🙂
What do you think of him? Like our DIY Wall Mounted Wampa Head, this is a pretty in-your-face piece of geek decor, so we’re planning a few bits of subtle geekery for the next couple of posts.
 Lisa says
April 13, 2014 at 6:00 amYour Claptrap looks very cool and very authentic … but I found him too annoying to want to have him in my home! ~___^ I’m kinda glad yours doesn’t talk (yet?)!
 ournerdhome says
April 22, 2014 at 11:10 amThank you! It took us a couple of play-throughs of the games to learn to love him, haha.
 Joie Fatale says
April 13, 2014 at 3:23 pmSo great! I love this tutorial, and I know a few people who would love this as a gift! Thank you!!!
 ournerdhome says
April 22, 2014 at 11:11 amThank you! Let us know if you end up making any as gifts!
 Haley says
April 13, 2014 at 6:00 pmBeautiful execution! I bet it will hide dirt well too.
 ournerdhome says
April 22, 2014 at 11:12 amThanks! And good point! If he gets dirtier, he’ll probably end up looking more authentic anyway. 🙂
 latinrocker says
April 14, 2014 at 12:41 pmCANT FIND ONE ON EBAY I MUST BUY ONE NO TIME TO MAKE IT :S
 ournerdhome says
April 22, 2014 at 11:12 amIf we wind up with extra time on our hands, we’ll make a couple more to sell!
 Echocookie says
May 3, 2014 at 10:59 amI would love it if you made some to sell… Also, I have a suggestion that could be pretty cool. My idea is that when you open the trash can, it triggers a recording of Clap Trap himself and has a couple different quotes of him. Of course, you could turn that off, he can get a little annoying at some times 😛
 Freddis Smith says
April 14, 2014 at 4:31 pmok but how will the trash truck ever pick it up now though
 ournerdhome says
April 22, 2014 at 11:14 amHe’s made from the type of kitchen trashcan that you only keep indoors, with a trash bag inside (so when it’s full we go put the bag in our outdoor trash can for pickup). 🙂
 Lori says
April 14, 2014 at 7:50 pmI LOVE THIS TUTORIAL! and Borderlands. And the Claptrap. And your blog <3 🙂 Thank you for sharing this awesome tutorial! I will definitely be making this!
 ournerdhome says
April 22, 2014 at 11:15 amYay! And thank you! We seriously cannot stop playing Borderlands. And now Poker Night 2 (even though we don’t play poker), just because Claptrap and Moxxi are in it, haha.
 Rebecca says
April 15, 2014 at 12:14 pmOH Y GOD I must do this. We are having a borderlands themed wedding 🙂 I love this blog, i want to live in your house
 ournerdhome says
April 22, 2014 at 11:20 amYou’re having a Borderlands themed wedding??! That is awesome and we want to go. 🙂
 Andy Whitlock says
April 22, 2014 at 9:13 pmBorderlands wedding!? Do you have a photographer yet? We’d give you a sweet deal.
 Kristy gd says
April 19, 2014 at 5:15 amOk, this is just too cool. Love the idea, the execution, and the easy to follow instructions. Love it!
 ournerdhome says
April 22, 2014 at 11:22 amThank you! We were worried that the instructions weren’t as clear as we wanted them to be (it’s hard to know technical terms when talking about PVC pipes and random plastic bits from Home Depot, haha), so we’re glad it made sense!
 Stephanie Lormand says
April 19, 2014 at 1:18 pmThat is wicked cool! 😀
 ournerdhome says
April 22, 2014 at 11:25 amThank you! 😀 Claptrap is happy for all of the attention he’s getting, haha.
 fred says
April 22, 2014 at 2:27 pmget a borderland soundboard on you phone, bluetooth speaker on the inside and bam. i am going to be making these for xmas.
 Abril Santos says
April 22, 2014 at 2:34 pmThis is great, i love claptrap and my brother does too, so it will definitely be a good addition to our home.
 handsomre jack says
April 22, 2014 at 3:18 pmCan i just buy one from somone who made one? Message me on twitter if youre interested
@handsomejackfm
 Nikki says
April 23, 2014 at 4:31 amPlease just take my money already!
 cynicalbadger says
April 25, 2014 at 3:40 amThis is amazing! 100% fell in love with this straight away and I think a voice box would be a lovely little addition. Me and the boyfriend are currently replaying Borderlands 2 and forgot how amazing this little guy is. Thank you for the guide as this is a MUST for my future home.
 Patricia @popsdemilk says
April 25, 2014 at 6:18 amWow, this is really amazing! Most awesome trash can ever!
 Jordan says
April 29, 2014 at 7:37 pmThis is so cool if you make any more
I will buy one
 Brian says
May 9, 2014 at 2:17 pmIs there a way to get a voice modulator for Clap Trap so he talks? Like certain thing cue him and he says something funny? If there is one can you post a link? I’m 17 and my dad and I are going to go hard on this project. I love this btw 🙂 🙂
 YabbaCam says
May 15, 2014 at 4:45 amIs the lid still step on or lift up? Thinking of making my own and want to know if I need a step on.
 ournerdhome says
May 24, 2014 at 11:05 amWe used a step-up-lid trash can and removed the step mechanism. That left a depressed area in the front where ‘Trap’s wheel could live. Good luck and send pics when you are done!
 michael zeitvogel says
May 24, 2014 at 2:10 amI want to do this 2 for my friend its kinda the best birthday present idea ever i guess he will love it
 Giselle S. says
June 10, 2014 at 9:44 pmI loved this project and am working on my own claptrap now. For future reference, more pictures of the side/top to see paint detail would be a good idea.
 Chuck says
July 24, 2014 at 9:46 pmThink I will make a Jacobs themed one.
 Nathan says
August 25, 2014 at 9:13 amWhat is the plastic container you used for the mouth grill?
 ournerdhome says
August 26, 2014 at 5:07 pmThat was just a random plastic container we had lying around – it might have originally held grass seed? Or laundry detergent? (we obviously hold on to way too much “junk” for DIY projects) 🙂 You could definitely just use cardboard or a paper plate though, painted black with dark gray lines painted on.
 Phylania says
October 19, 2014 at 2:20 pmWhat kind of drill did you use to get the holes in the side of the trashcan?
 Megan says
November 29, 2014 at 6:34 pmI am making this for my husband for Christmas! =) I am having a bit of trouble finding a few of the fittings for his arms though. I can’t figure out what the one is that attaches the arm to the body (the circular piece with a hole). As well as the circular piece that you attach his cardboard hands to. I think other than that I was able to figure out the all thanks to your amazing tutorial! =) I really can’t wait for Christmas! My husband is going to love it! Thank you so much!
 ournerdhome says
November 30, 2014 at 1:06 pmHi Megan! That’s awesome that you’re making one for your husband! We’ll take some close-up pictures of the pieces later today and post them here for you. 🙂
 Megan says
November 30, 2014 at 2:43 pmThank you so much! I am almost done! I just have to do his arms and the wheel! He looks so awesome! =) We love claptrap! Thank you so much for sharing! I wouldn’t have been able to do it without your wonderful blog!
 ournerdhome says
November 30, 2014 at 9:21 pmHere are some links to close-up pictures:
https://ournerdhome.com/wp-content/uploads/2014/11/photo-3.jpg
At the “shoulder”, the decorate square piece with the round hole is a vent hose connector from Home Depot. Seems like the kind of thing that connects a vent hose to a clothes dryer? Should be in the washer/dryer aisle. We spray painted the connectors and attached to the body with strong glue (like e6000).
https://ournerdhome.com/wp-content/uploads/2014/11/photo-2.jpg
The arm is attached by drilling a hole about the size of the PVC pipe and sticking the pipe through. That acts as the joint and attaches to the T-shaped pipe attachment.
https://ournerdhome.com/wp-content/uploads/2014/11/photo-1.jpg
At the wrist – sorry, we don’t know the exact name of the piece we attached the hand to, but it’s some sort of PVC joint or attachment, just glued on with e6000. Any kind of round plastic piece should do!
Hope that helps! We’re happy to answer any other questions. 🙂
 Megan says
December 3, 2014 at 5:20 pmOh my goodness, thank you so much! I I’m so excited to get him all put together! =) He looks awesome already! Thank you again for your detailed tutorial and for bringing claptrap to life!!
 Stacy McDaniel says
June 7, 2015 at 2:17 pmI just want to thank you, because you inspired me to make me own. Could not have done it without you!!!
You can see my ClapCan here: http://s141.photobucket.com/user/stacycmc/Claptrap%20Trashcan/story
 ournerdhome says
June 7, 2015 at 2:35 pmThat is awesome!! Love the shot of him playing fetch. 🙂
 Stacy McDaniel says
June 8, 2015 at 11:25 amOur dog, Leeloo, was like “huh”. Hahaa, yeah I had fun “posing” him around the house.
Thanks again for the awesome tutorial. NEVER would have thought of it otherwise or could have did it without your great walk through.
Your guys’ blog rocks, such awesome and fun ideas. Keep ’em coming!