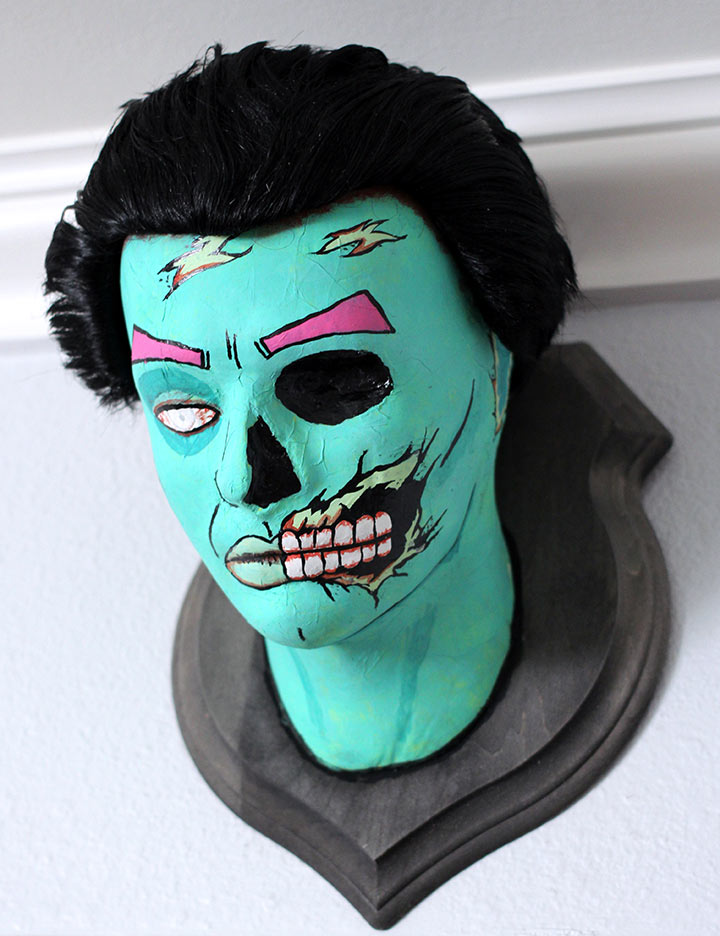
This month had a mega Walking Dead marathon on AMC, plus we finally caught up on the WD comic books, AND we’re celebrating the success of our zombie-themed Kickstarter project, AND (sorry, a lot of ands) we just like zombies. That said, here’s a really easy-to-make DIY zombie head plaque, pop art zombie style.
And apparently we like mounted fictional heads, since now we have TWO. This guy, and our DIY Wampa head.
You need:
Foam head
Tissue Paper
White glue or Mod Podge
Water
Acrylic craft paint
Wig (optional)
Plaque (or DIY one)
Picture hanging hardware
Initially we wanted to make a rockabilly style pin-up wall mounted zombie head. But then we ran across this amazing makeup tutorial from Batalash, and decided to go pop art instead. We didn’t stick exactly to the tutorial, adding a bit more blood and cell-shaded-esque lines, but you get the picture.
We started with a foam head. We got ours from Amazon (here), but you can also get them at beauty supply stores. We also grabbed a cheap male wig from a local year-round Halloween store.
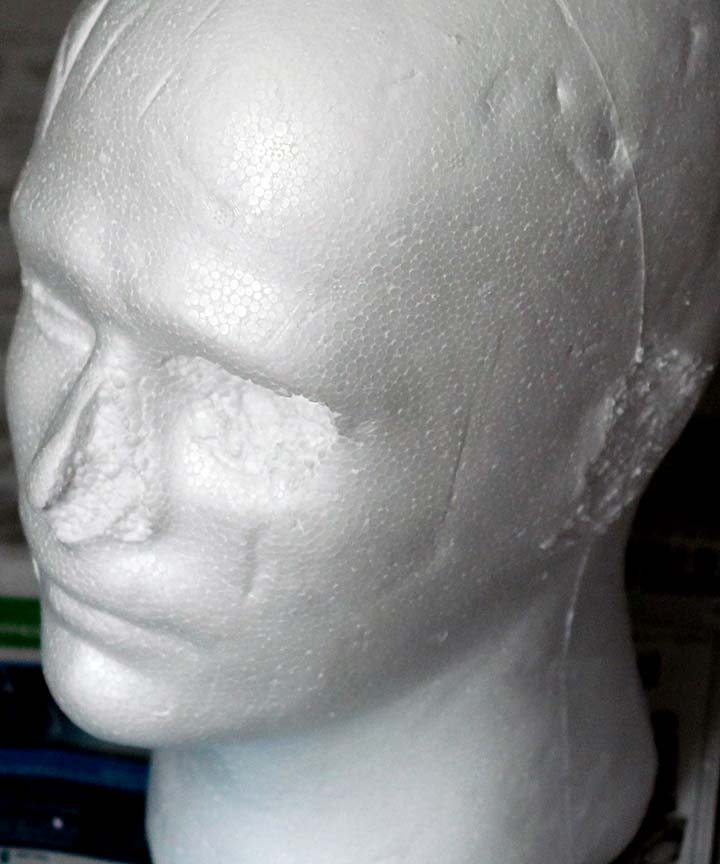
First, zombie-up your foam head. We gouged out an eye and cut off half of the nose and one ear, using a kitchen knife.
Second, mix up a little concoction of either mod podge or white glue, mixed with water. We did about a 50/50 mix of mod podge and water. We used green tissue paper for the next step, to make painting easier, but white is fine too.
Glue the tissue paper to the foam head, using your glue/water mixture and a brush. We found it works best to use smaller strips (hand torn) of tissue paper. The reason for this step is because paint + foam doesn’t always work well, so the tissue paper gives a nice base. Plus it kind of looks like skin where it creases, so that’s something.
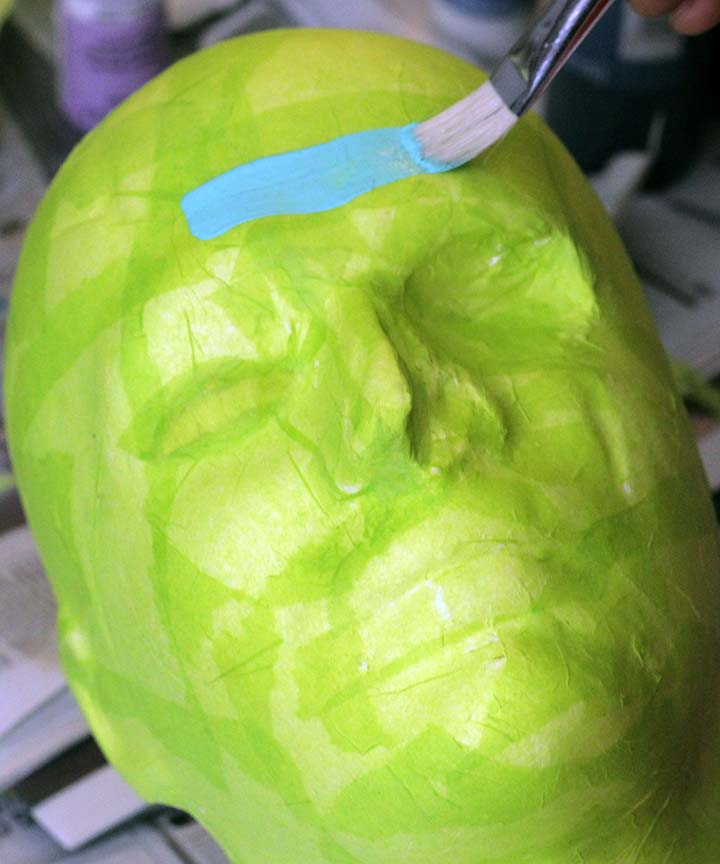
Now paint the whole face (we also did the back of the head, because initially we weren’t sure if we were going to use the wig or not) an aqua/seafoam/green color. We used that cheap $0.69 acrylic craft paint from Michaels for all of the painting on this project.
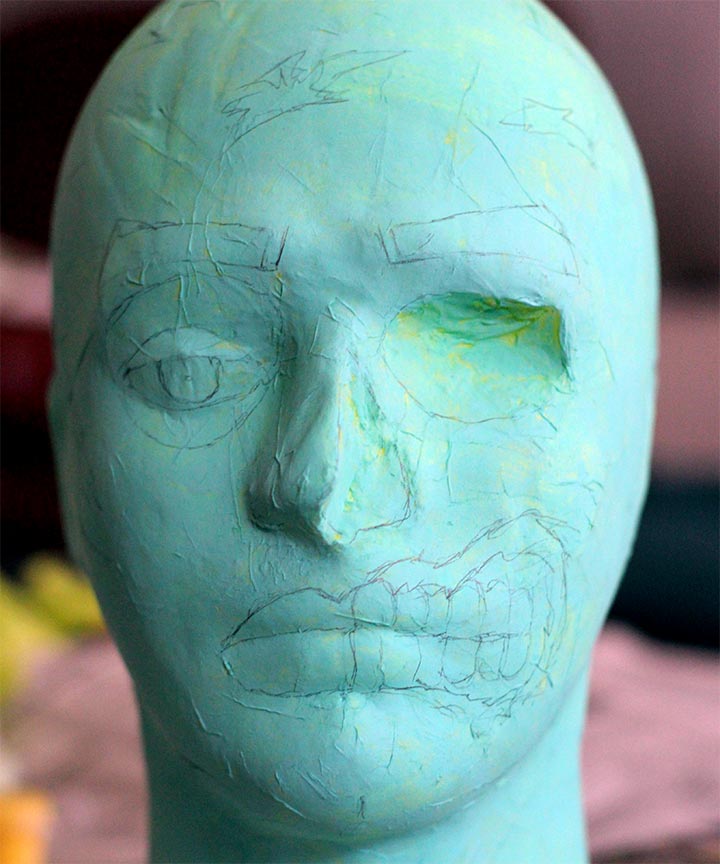
Once that is dry, somewhat follow the makeup tutorial for a pop art zombie, or just wing it and make your own! We drew everything out first in pencil, so that we could get an idea of how he would look. We wanted him more masculine, so roughed up the design a bit with more shading/lines and bits of blood around the teeth and mouth.
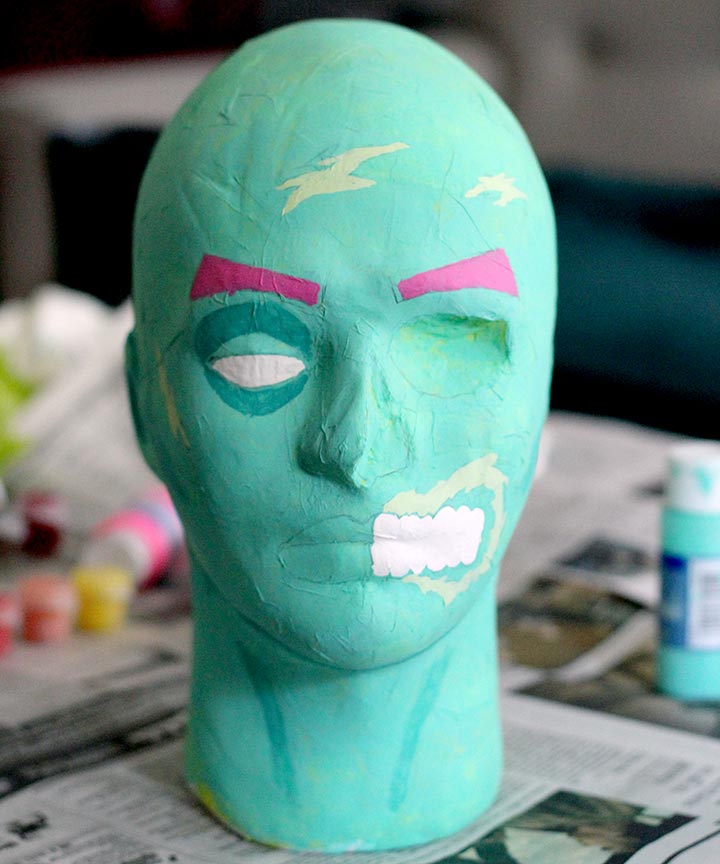
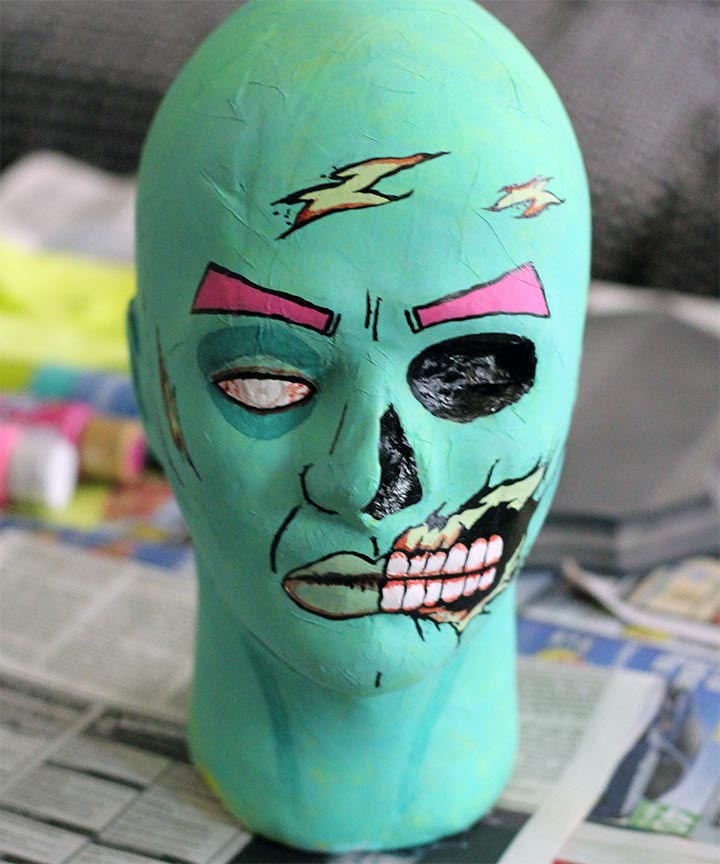
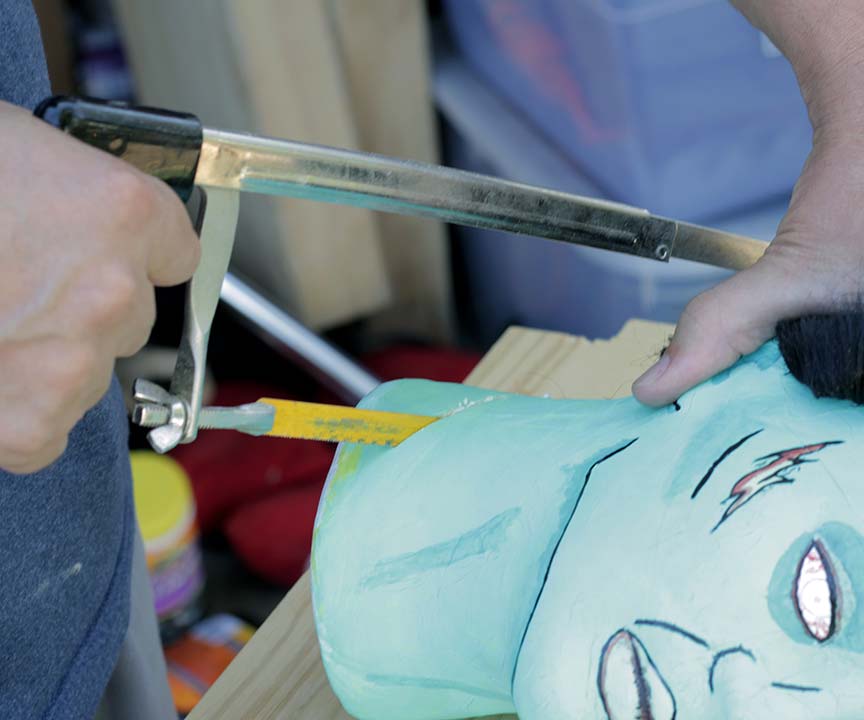
When you’re happy with your zombie “makeup”, use a sharp knife or handsaw to cut the back of the neck off at an angle you like.
Now the plaque! We used this one. You could also make your own, the way that we did for our DIY Wampa head taxidermy. Side note: I can’t even tell you how many times I accidentally typed “plague” instead of “plaque” throughout this post.
We stained the plague plaque with a paint wash, using a 50/50 mix of black acrylic craft paint and water, applied haphazardly with a paper towel. It dries quickly and looks kind of distressed and faded. We like.
The back of the zombie neck was a little rough and jagged, so we went over it with sandpaper to smooth everything out. That’s optional.
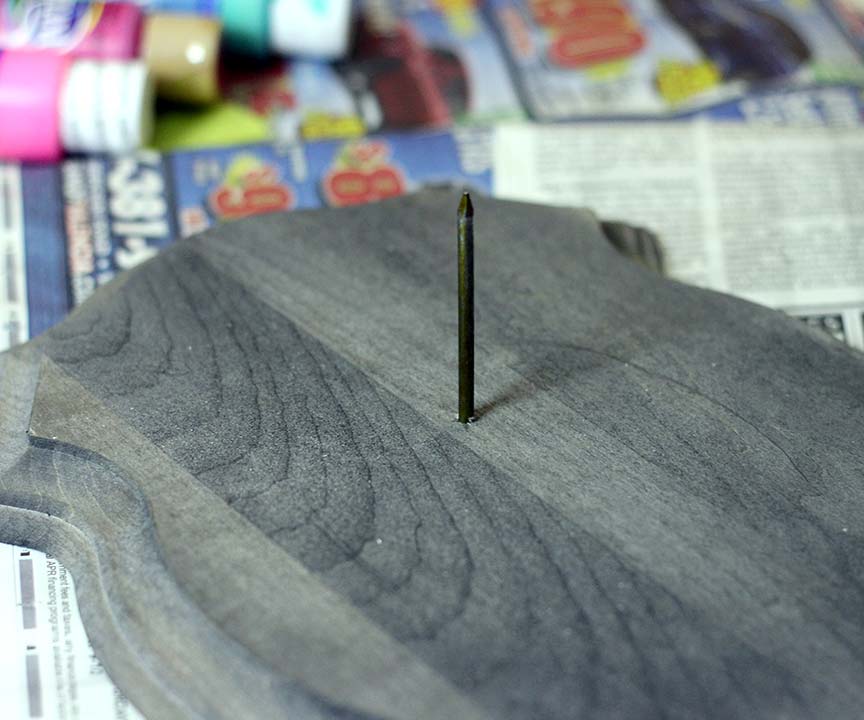
Hammer a long nail THROUGH the back of the plaque, making sure the nail is where the zombie neck will be. Throw some glue on the back of the zombie neck AND on the plaque, then push the neck onto the nail, so that you know he won’t be going anywhere. Grrrr Arrrr.
Put the wig on (we glued ours down), trim it up and style it, and your new wall mounted zombie head is done! You can attach any kind of picture hanging hardware (like these) to the back of the plaque, or maaaybe even use Command strips, since this guy isn’t very heavy.
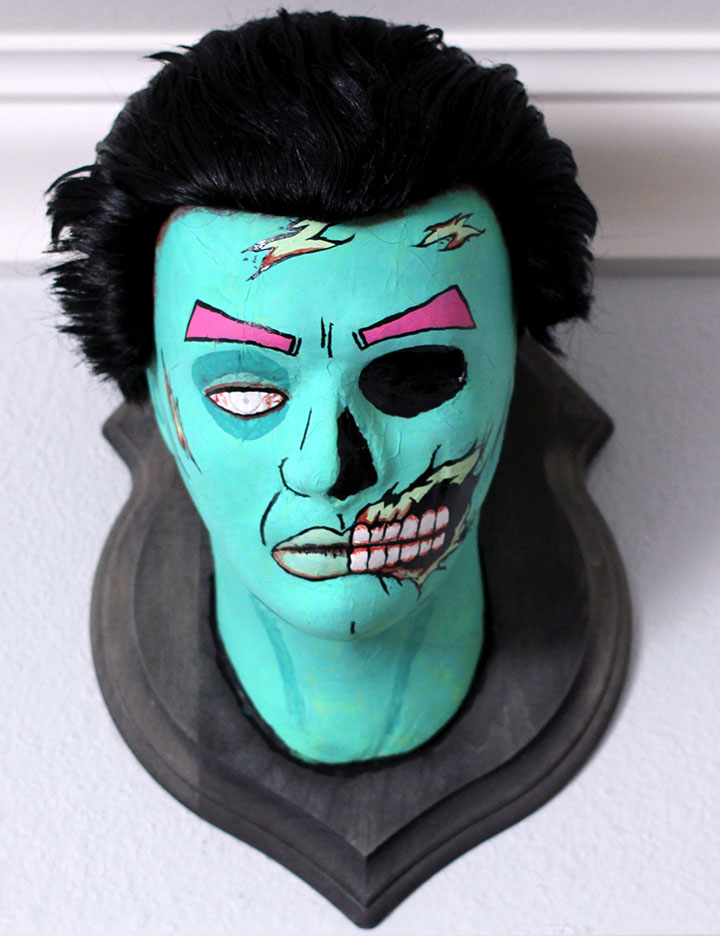
What do you think? Good DIY geek decor piece for your next Walking Dead party? If you want him more gory/realistic, just go with a flesh toned paint and go for all-out nightmare inducing terror with your “makeup” job.

 RaChil Luke says
July 17, 2014 at 8:16 amOhhhh I love it! I saw one of those foam heads at Joanns today and I wondered what you could use it for besides modeling. This is amazing and I totally need one for Halloween!!
 Jessica says
July 17, 2014 at 4:24 pmOoh this WOULD be great for a zombie party! I like how it’s not TOO scary… I can actually stand looking at this one without crying from fear 😛
 Lisa says
July 18, 2014 at 7:43 amThat is so cool! I love his pink eyebrows ^___^