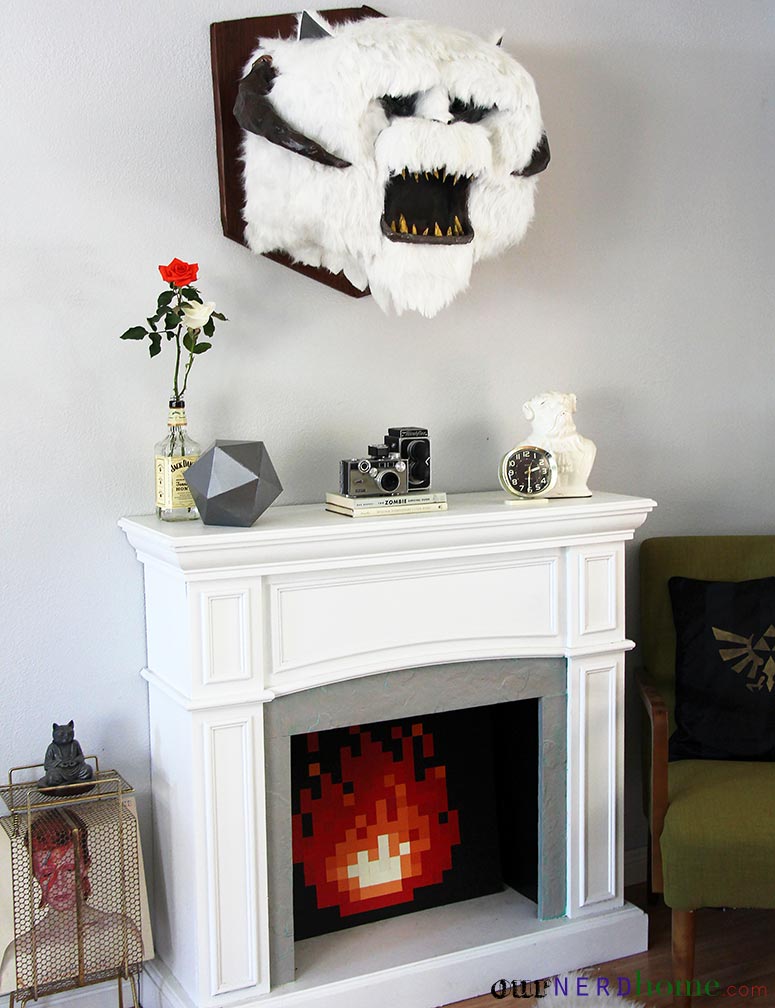
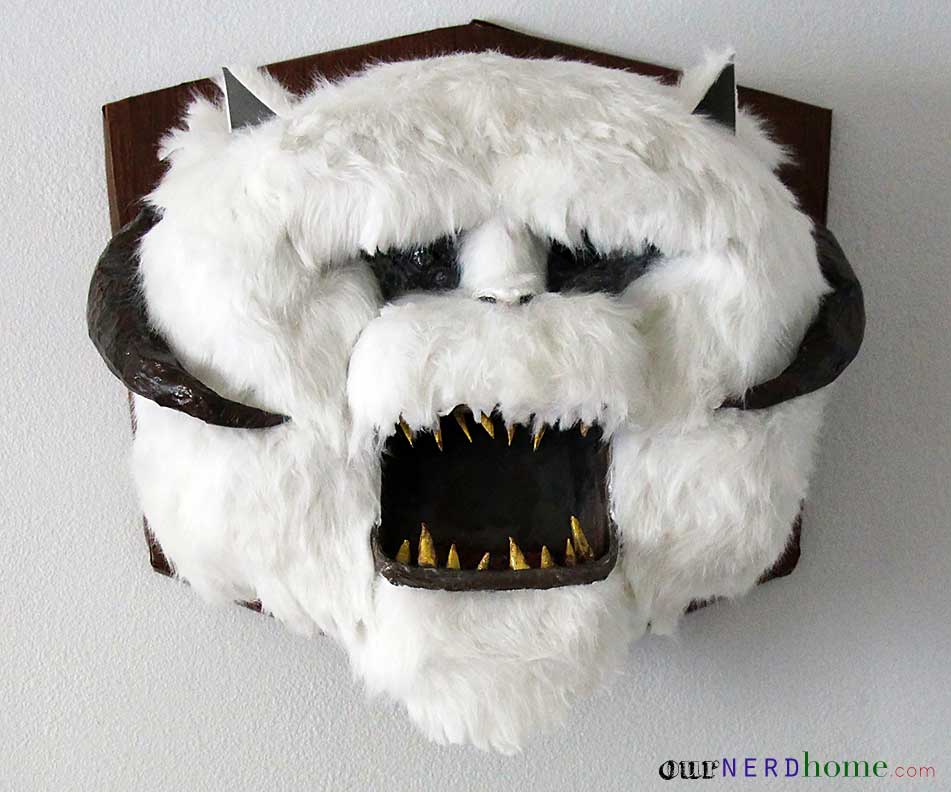
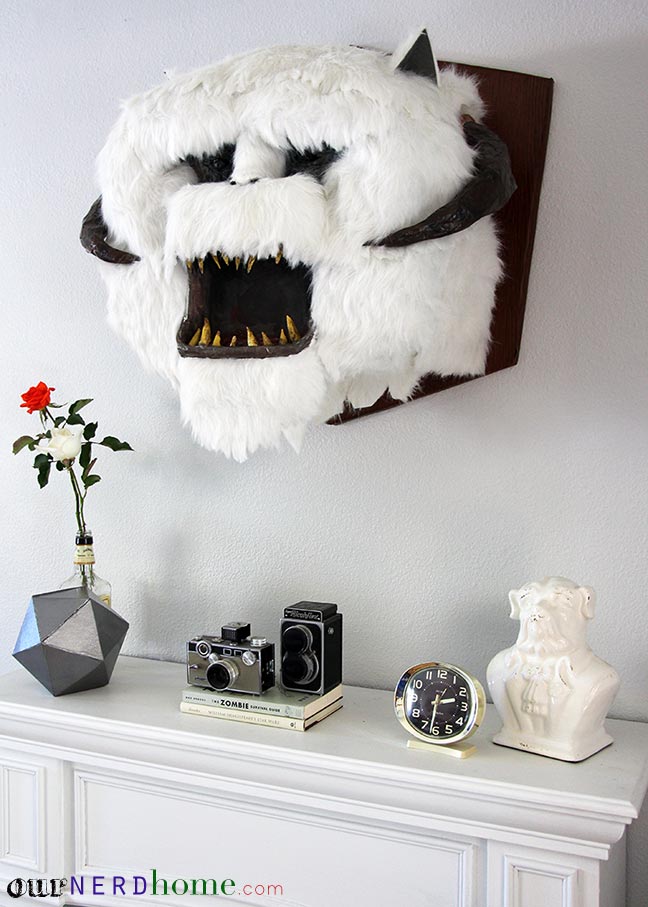
Hey look at that. We have a huge DIY Wampa head mounted over our fireplace (“fireplace”). Here’s how to make it.
As you know, this is a Wampa. You might have seen some of the Photoshopped taxidermy Wampa head pictures floating around the interwebs for the past few months (like these). We saw them too. And said “Yep. A Hoth-based Star Wars carnivore head would look great over our mantel”. That’s a reasonable thing that people say, right?
We set out to keep the cost low and build the head with common household items (plus some faux fur). Total cost for the project was under $20 – even less if you don’t add the fur – it took a few hours to make, plus a ton of drying time. It measures approximately 30×25″, and 17″ deep.
Here’s what you will need:
Cardboard boxes
Newspaper
Tape
Paper Towels
Flour
Craft Glue
Paint – acrylic, poster paint
Scrap Wood
White Fur (optional)
Wood Grain Contact paper (optional)
Star Wars: The Empire Strikes Back blu-ray (to watch while you make it)
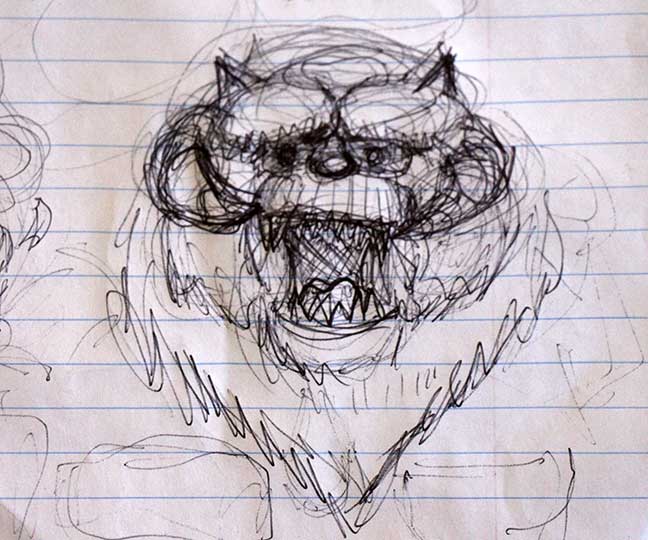
Here is the initial sketch. I did take some artistic liberty with the design, so he’s a little less “puff ball”. Kat approved, so we got to work.
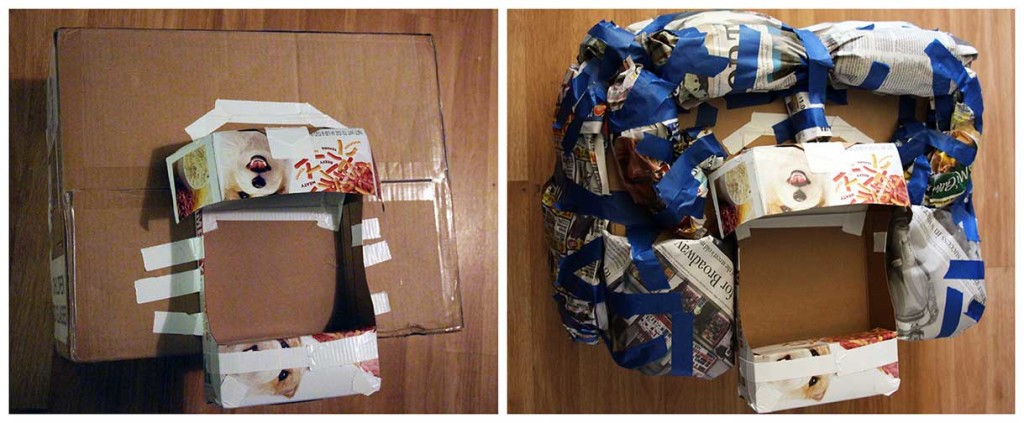
 We started with a large cardboard box. I cut a pet food box apart and created a rudimentary mouth over the base box. Balls of newspaper taped together became a basic muscle structure.
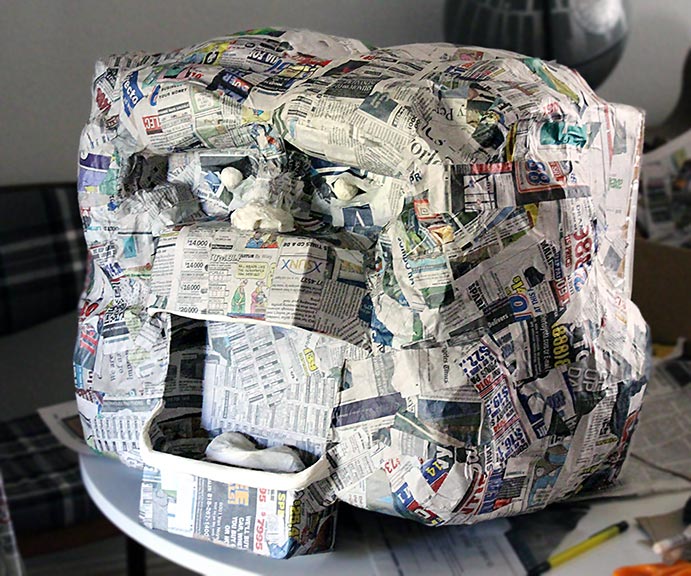
 After we had the general shape we wanted, we dove into the papier-mache. We found this site and went with her user-friendly recipe. 1 part flour to 4 parts water, boil the mixture, stir until it’s a thick paste.
We tore a stack of newspaper into probably a million several strips. We dipped the strips in the mixture and applied them to the frame. For the lips, nose, eyes and tongue, we used paper towel instead of newspaper. It was very moldable and made some smoother shapes. Those were attached to the head with excess papier-mache glue stuff.
 After letting everything dry overnight, we painted the entire head with white poster paint. Much cheaper than acrylic paint.
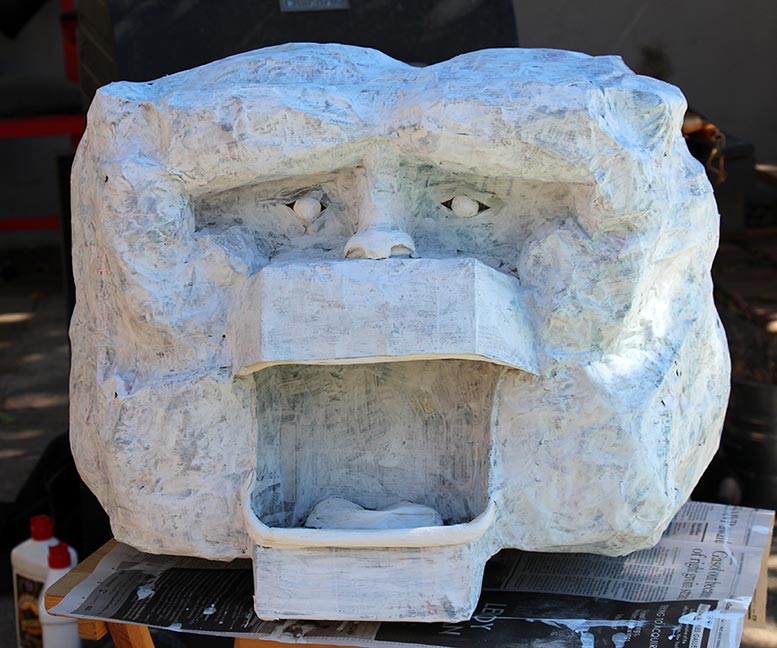 We rolled up and taped a bunch of cardboard teeth, and covered them with papier-mache paper towel. The horns are rolled up brown grocery bags taped into a horn-shape, covered with papier-mache newspaper.
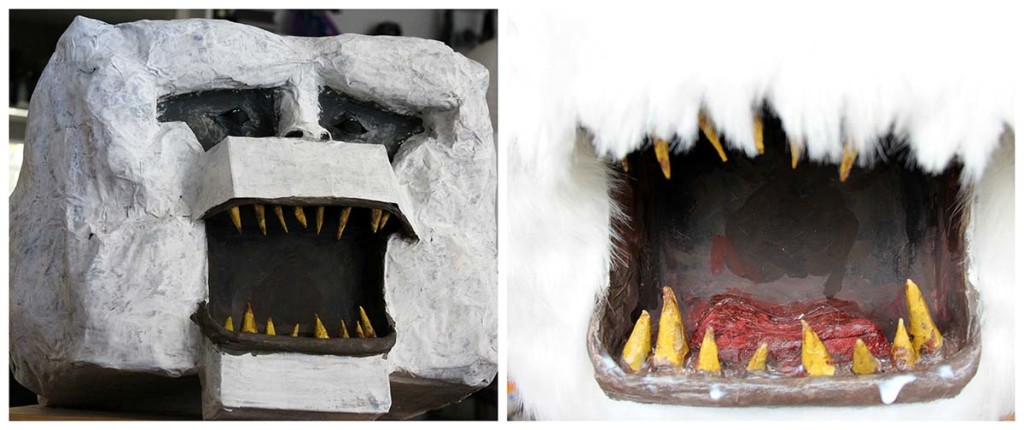 We painted the eyes/eye area, mouth, tongue, and teeth with acrylic paint. We added another strip of papier-mache paper towel as gums to secure the teeth. The teeth, tongue and eyes were coated with Mod Podge to give it all the appropriate shiny/slobbery effect.
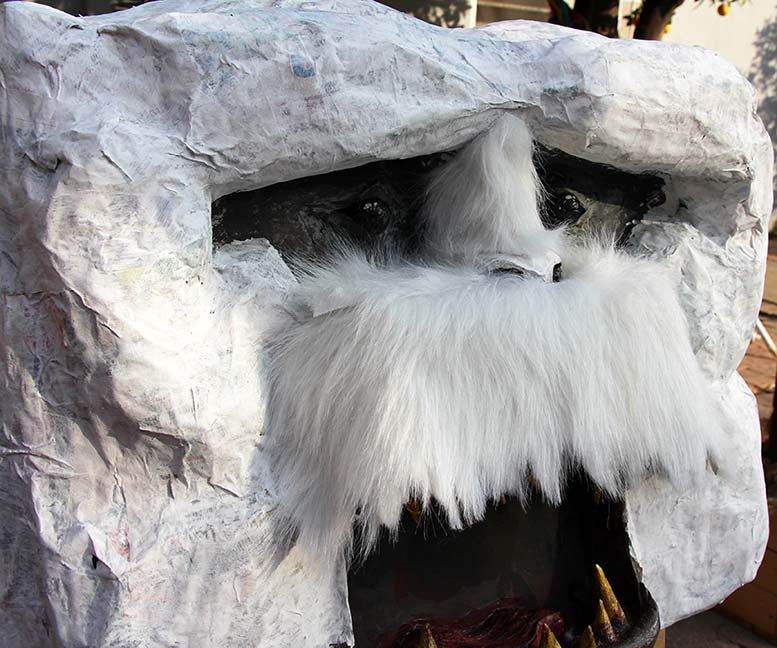
Initially the plan was to just paint the Wampa head with a couple coats of white paint and leave it like that (which is why it’s covered in papier-mache in the first place). After one coat, we kind of “meh’d” and decided that faux fur would look better. If you want to cover your DIY Wampa head with fur as well, the papier-mache newspaper on the head is optional (though it does help you work out its “bone” structure so you get a better idea of what the final piece will look like).
The faux fur is about $8/yard at your local craft store, assuming you use the coupon they all have on their apps/newsletters. One yard is plenty. Work in small sections with the fur, gluing it piece by piece. Finish it off with gluing the horns into place, and adding little cardboard/fur triangles for the ears.
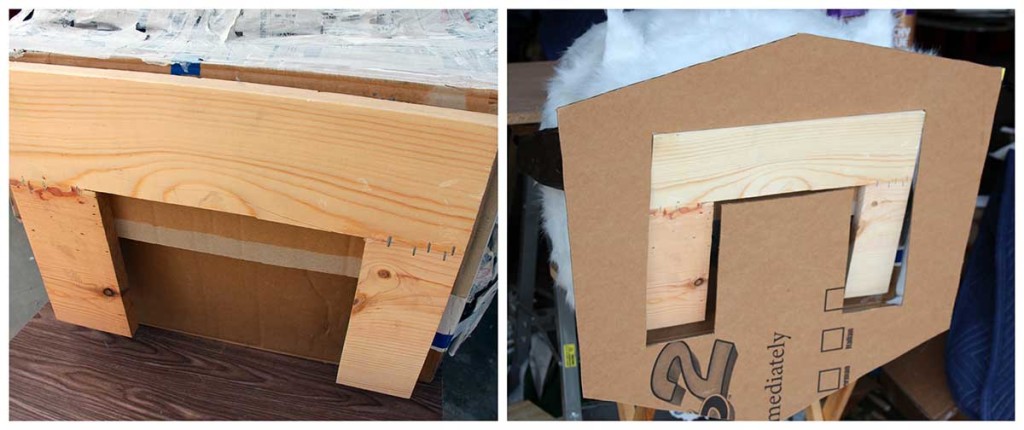
 We stapled a small piece of scrap wood to the back of the cardboard box (er…Wampa skull) for hanging. The decorative mounting board was constructed out of cardboard, covered in wood-grain contact paper. You don’t want to put any weight on the cardboard mount, which is why it sits around the wooden back.
 After a trim around the eyes and a little off the top, we attached a picture mounting wire to the wooden frame in back and hung Mr. Wampa above the mantle. He doesn’t weigh much, since he’s hollow and made of cardboard.
So there you go, a Star Wars DIY Wampa head made from things you can find around the house (plus some fur). What do you think?
 PS: The top pic has our DIY 8-bit fireplace, giant DIY D20, and DIY Zelda pillow. Our nerd home (our actual home, not specifically this website) is starting to come along!

 jessibethviera says
February 17, 2014 at 6:01 pmVote for you! Love always seeing amazing things! 😀
 ournerdhome says
February 19, 2014 at 1:07 pmYay! Thank you so much! 🙂
 Kristy gd says
February 17, 2014 at 7:08 pmNomination complete! The more geeky home decor out there, the better! (I don’t comment much, but love your blog. Thanks for keeping me entertained!)
 ournerdhome says
February 19, 2014 at 1:09 pmThank you! + you’re very welcome. And yes, we have always struggled with how few sources there are for good/affordable geek decor, which is part of why we had to start making our own (but now we’re hooked!).
 Lisa Black says
February 17, 2014 at 9:33 pmWow, amazing! I think the faux fur really makes it looks especially wampa-ry ~___^
 ournerdhome says
February 19, 2014 at 1:11 pmThanks! 🙂 When we were being lazy and just wanted to paint it, we tried to justify it to ourselves as “Well, maybe it’s a LEGO Wampa head”. Haha. In the end, $8 of faux fur plus 40 minutes to glue it on was totally worth it. Also, thank you for introducing the word “wampa-ry” to our vocabulary.
 Sam says
February 18, 2014 at 5:43 amFreaking amazing, funny and slightly sick (ModPodge for the slime) but TOTALLY Wild and fun!
Thanks for the nerd decor!
 ournerdhome says
February 19, 2014 at 1:13 pmThanks, Sam! Confession: The ModPodge was initially a mistake. Cam accidentally dripped some onto the mouth, then we both stared at it and had a “Yes! Slobber!” moment.
 Yvonne Takane says
February 18, 2014 at 6:58 amVoted! The Wampa is totally cool. Not something I could see in our own house (we’ll have to make do with a TARDIS on the mantle) but very neat idea to take a photoshopped meme to life.
 ournerdhome says
February 19, 2014 at 1:16 pmThank you! We were kind of nervous to put it over the fireplace at first, since it is SO in-your-face huge/ridiculous, but now that we’re used to it we might keep it there permanently. Mainly because our house is so small we have no room anywhere else, haha.
 Joie Fatale says
February 18, 2014 at 1:36 pmThis is bloody brilliant!
I am SO doing this!
 ournerdhome says
February 19, 2014 at 1:18 pmYou should! If you do, please put it on your blog or send us a photo – we would love to see. 🙂
 Mellzah says
February 20, 2014 at 4:26 pmEverything about your house is amazing and I want to do it in my house.
 ournerdhome says
February 21, 2014 at 9:20 pmThank you! Speaking of amazing – your Gravatar profile picture.
 Mellzah says
February 22, 2014 at 1:46 pmHaha thank you! It’s from a series of “soul portraits” I did over on my blog. 🙂
 Perla says
February 21, 2014 at 8:37 amJust voted for you! Love your site and easy to follow instructions! I’m adding the Wampa head to my To-Do list! I’m currently working on Game of Thrones costumes projects.
 ournerdhome says
February 21, 2014 at 9:26 pmThank you, Perla! We appreciate it. 🙂 And Game of Thrones costumes sound cool! If I could sew, that would go on our to-do list, haha.
 hohmeisw says
February 23, 2014 at 4:10 pmI love the Wampa head. I love the David Bowie picture even more.
 ournerdhome says
March 1, 2014 at 8:22 pmThank you, on both counts!
 Dave Fitz says
February 26, 2014 at 10:24 amGreat job–but be careful: Research shows that Wampa saliva may cause damage the one-eyed Argus lingering below.
 giantsizecomicthings says
March 29, 2014 at 3:09 amYour house is amazing. I’m looking forward to moving back to the US and buying a house for many reasons, but doing things like this is a huge part. You’re an inspiration. We were thinking of doing heads like this or many different fantastical creatures for our library. I can’t wait to see what else you do and when we finally get the chance, I’ll share our work with you but always give you credit for the ideas. Great stuff!
 Crowe says
June 4, 2014 at 12:16 pmAwesome. I’m definitely going to try this. Also gave me the idea of creating a Rancor head (possibly covering it with faux leather for the skin?), a Wookie, Taun Taun, Ewok… etc. The nerdom is endless.
 ournerdhome says
June 5, 2014 at 2:57 pmDefinitely endless. We can see the Rancor and Ewoks for sure (never trusted those savage little beasts) and the Taun Taun is next on the list as a companion piece (we JUST noticed the Taun Taun head in Jabba’s palace :O ).
But I think Chewie might rip your arms off if you made a Wookie head 😉
 Babetron says
October 14, 2014 at 3:00 pmThis is great for our retro space theme in our family room. I’m currently on the paint stage. I bought the fur, but I’m perplexed where and how to attach the horns. Were they placed before adding the fur?
 ournerdhome says
October 14, 2014 at 3:15 pmA retro space theme family room sounds amazing! The horns were attached (hot glued) directly to the cardboard “head”, before the fur went on. We did the teeth and horns at the same time. Hope that helps!
 k c says
February 21, 2015 at 7:01 pmthank you for the inspiration! we just finished mounting our wampa in the living room (I’d share a pic but wasn’t sure how ). Your everything is amazing!
 ournerdhome says
February 22, 2015 at 5:02 pmThank you!! 😀 And that’s awesome. If you’re on Facebook/Instagram/Twitter or anything, feel free to share/tag pics with us there (https://www.facebook.com/ournerdhome).