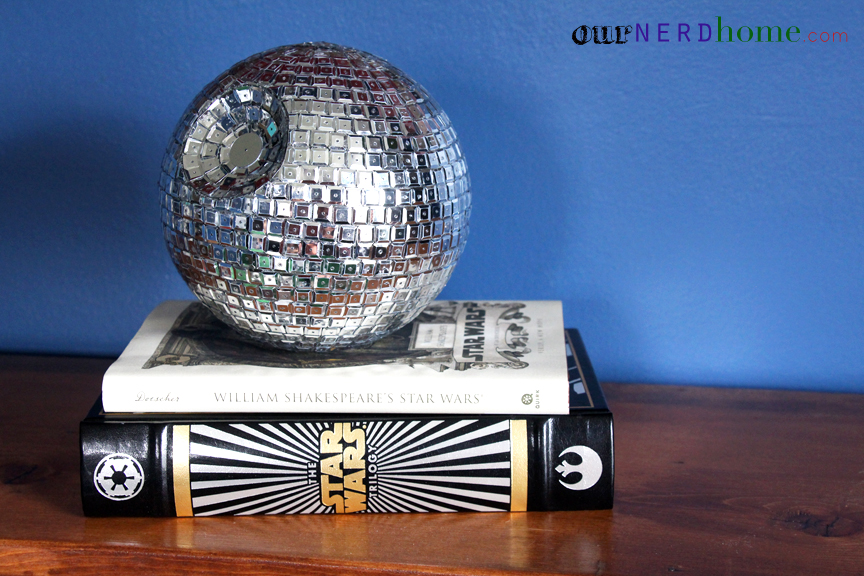
 Do you love Star Wars, shiny things, and have a few hours to spare? Then this one’s for you! A DIY Death Star Disco Ball.
This project was inspired by a really cool Death Star disco ball art print that we saw going around Pinterest.
First off, our version is not REALLY a disco ball, since it’s not mirrored. But this way is far cheaper and easier than using tiny mirrors. We used little square silver sequins, which cost less than $4 for the whole project, and a medium sized styrofoam ball (also under $5). We just used cheap white glue that we had on-hand.
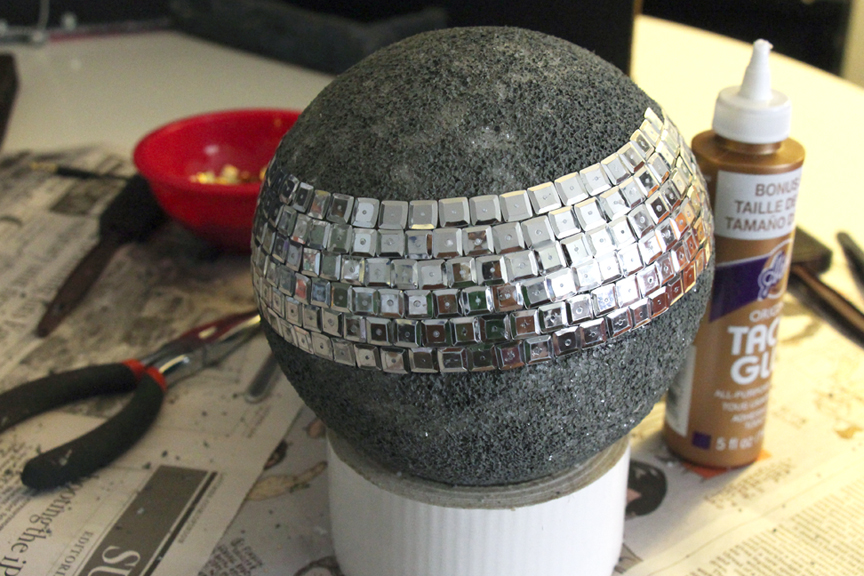
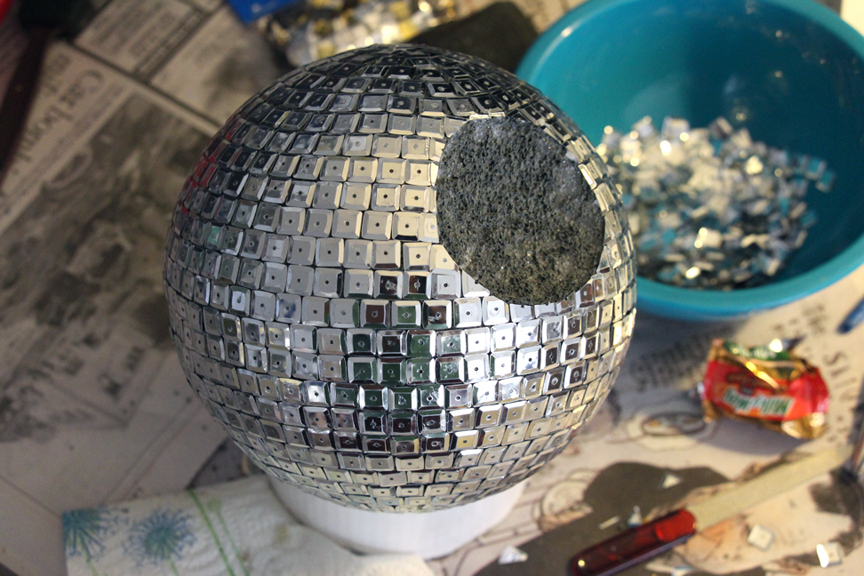
We painted the ball gray with acrylic craft paint, gouged the cannon hole out with a spoon, then settled in for a few hours of gluing. We started in the middle, after drawing an equator around moon – er, Death Star. We took turns, and in total it took the time it took us to watch the entire original Star Wars trilogy. We did take a lot of breaks though. So while this is a super easy DIY project, it’s not exactly quick.
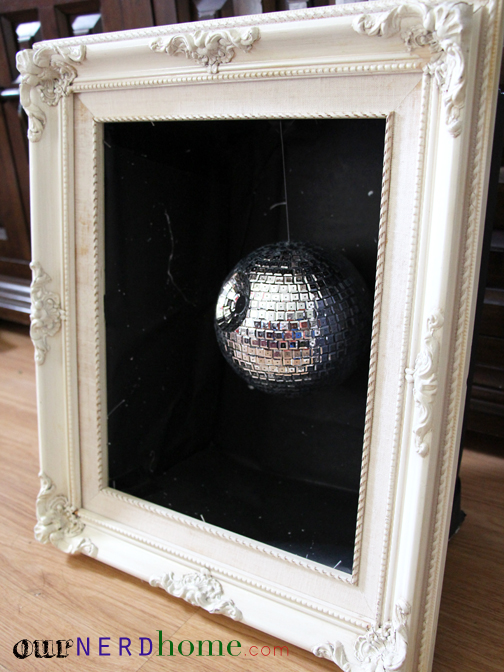
Oh! While I was writing this post, roommate extraordinaire Corey came in with this shadow box that he built for the happy shiny Death Star disco ball. So here’s that:
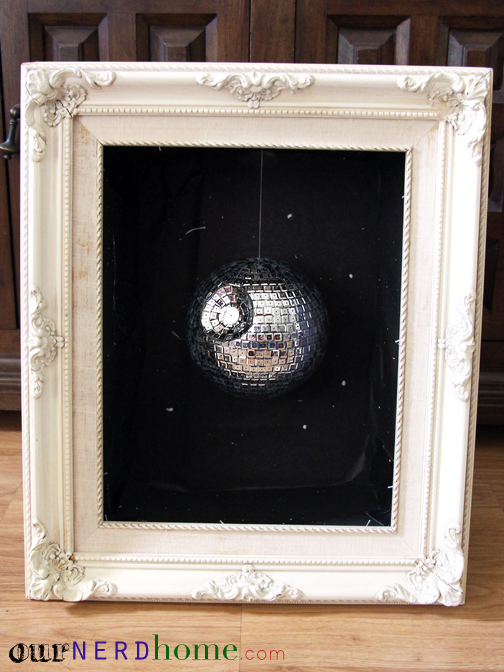
Pretty cool, right? Baroque Disco Death Star?
We’re also thinking about making a bunch of mini Death Star’s for holiday ornaments this year. Cause nothing says Christmas like a superlaser-armed battlestation?
Check back for more geeky home decor DIY projects!

 bri doyle says
October 29, 2013 at 5:50 pmI think I love you guys…
 Amber E. says
October 29, 2013 at 7:32 pmI’m sitting here like :O because THIS is the best thing I’ve seen in a while and that shadow box completes the all.. the everything. I’m looking to erase my mind of chevron and you are most definitely helping.
 Lisa says
October 29, 2013 at 11:27 pmOh my gosh, this is so excellent! I made some 2-D Death Star ornaments for our tree last year, but your idea is just so much more epic!! I’m definitely going to have to try this ^__^
 Sabine says
October 30, 2013 at 6:05 amYour DIYs are sooo cool. I always have to smile, when I see them. And this is a good one too. So cool! 😉
 Whitney says
October 31, 2013 at 5:50 amThis looks great! But how did you attach the string onto it?
 ournerdhome says
October 31, 2013 at 9:35 amThank you! To attach the string, we wrapped thread (we would have used fishing line, but couldn’t find any) around a nail, put some glue on the nail, and shoved it into the top of the Death Star. I’m sure there’s a better way to do it, but that’s all we could come up with on the fly!
 pamela says
October 31, 2013 at 8:31 amThis is so cool! Where did you find square sequins? I would love to make some Christmas ornaments.
 ournerdhome says
October 31, 2013 at 9:30 amThanks! We got them at Joann, but you can probably get them at Michael’s (or other craft store) as well.
 Holly says
November 1, 2013 at 11:31 amI love this, and am thinking of making it for my son’s room. The shadow box really takes it to the next level. Any tips for making something similar?
 ournerdhome says
November 1, 2013 at 12:57 pmThanks, Holly! Our version of the shadow box is made with cardboard, glue, duct tape, and black paint, fitted inside of a thrifted frame. It is just meant to sit on a shelf though, since the cardboard isn’t really sturdy enough to hang on a wall. If you plan on hanging, I would do it with hobby board or thick foam board instead. Corey built the box to fit the inner dimensions of the frame and glued it together, adding a little duct taping for extra stability. He painted inside and out with black paint, and splattered some white paint on it as “stars”. Then he glued the box into the frame opening, adding a couple of small finishing nails to help hold it in place. At first we hung the Death Star into it by a thread duct taped to the top, but we’ve since updated that and put a long nail through the back of the shadow box, then stuck the Death Star onto the nail (we wanted to go string-less!). We’re planning on making another one of these as a gift, so as soon as we do I’ll take photos of the shadow box building process and write a post about it!
 Allison Murray says
November 9, 2013 at 6:45 amHa! This is absolutely genius and so much fun. Wondering if I have the patience to make a good handful of little ones for my nephews’ geek chic Christmas tree 🙂
 RaCh says
November 11, 2013 at 9:56 pmThis is the definition of geek-chic. Your whole website makes me smile and I can’t wait to see what you come up with next!
 Alexis @ Persia Lou says
November 13, 2013 at 2:20 pmJust awesome!
 Lea Lane-Crea says
November 23, 2013 at 5:18 amI am I the middle of making my own and my cannon “hole” looks terrible. How did you get yours so perfectly round with a spoon? Also, did you use a bigger sequin in the middle of the cannon?
 ournerdhome says
November 23, 2013 at 9:58 amHi Lea! We first drew the circle on, then carved the hole out in a couple of layers. We did use the cheapest styrofoam ball we could find (it was under $3, with a coupon), so maybe that had something to do with it cutting away so easily?
And yep, we did put a bigger round sequin in the middle, after the fact. We liked it without it as well, but then remembered that we had a little packet of the big round ones, so stuck it on. We also thought about just putting a round piece of paper there, painted grey.
 Karen says
December 18, 2015 at 1:33 pmPerfect, thanks — these were my questions, too! Do I have time to make this to hang on the tree before Xmas? I’ve already had my 6-film rewatch! 🙂 thanks again, super coolness
 Lea Crea says
November 27, 2013 at 4:54 pmOk, thanks! Next time I will try scooping in layers. I bet that makes a difference. You guys have very cool DIYs, thank you so much for sharing them! Happy Holidays
 Britt says
April 29, 2014 at 7:45 pmThank you so much for this inspiration! I took on the challenge of making this Death Star for my son’s Star Wars-themed 4th birthday party and it was a huge hit! Definitely time consuming, but totally worth it. We used it as a topper for the cupcake stand holding his Darth Vader and Stormtrooper cupcakes. It was classic! Now we will put it in his bedroom!
 Shawna says
March 7, 2015 at 12:22 amI’m thinking this project + the globe project would pair nicely
 Harley says
July 7, 2015 at 3:10 pmWell crud. I went to do this project And used rhinestones instead of sequins. Way more expensive lol. Getting sequins for the smaller balls. .
 ournerdhome says
July 7, 2015 at 10:15 pmRhinestones must look amazing though!!! We always plan on redoing this with actual mirror squares, but the cost always stops us.
 Lorraine says
June 10, 2017 at 9:10 pmLove it. If I can figure how to recycle CDs. I might shread my husband’s
porn CDs and use them for this.
Pretty clever.