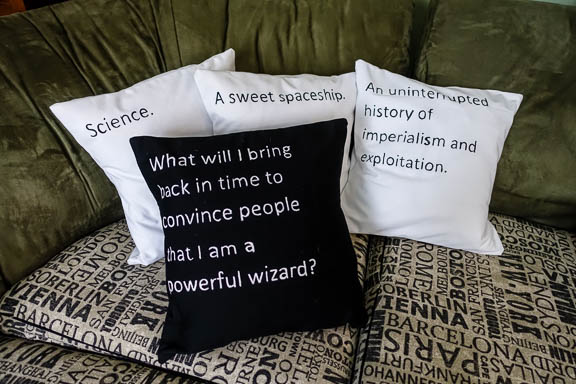
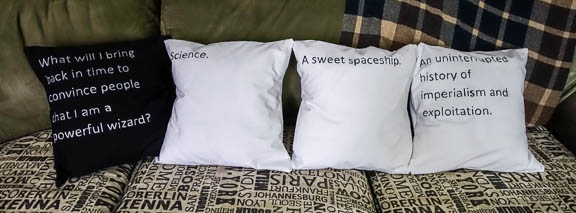
Hey look – a guest post! Please welcome Kristy gd from Please Excuse My Craftermath to the contributor team. We’re VERY excited that her first post here is based on one of our favorite games. Read on for her tutorial on how to make your own DIY Cards Against Humanity throw pillows. <3
Oh, Hi there! I’m so pleased to be guest posting here at Our Nerd Home and am really excited to show you how to make your very own Cards Against Humanity pillows! Fair warning, CAH is not work friendly. The question and answers I chose for this project were intentionally chosen to be PG, but the majority of the deck is not. So, if you’re easily offended, skip this project. If you’re already familiar with and love the game (or if you’re excited to learn about it), sally forth!
Materials
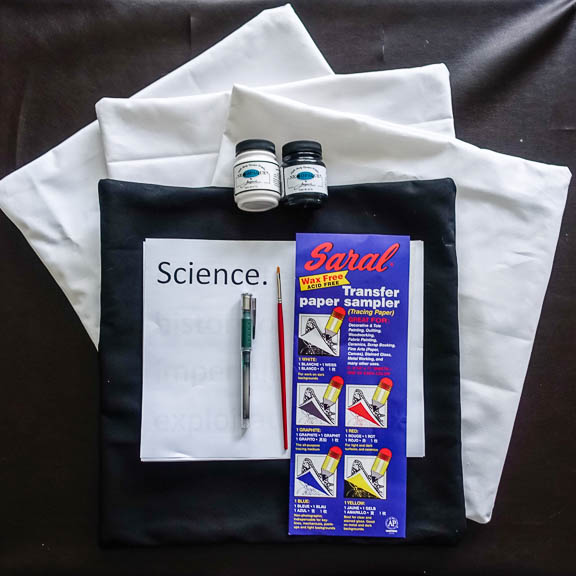
- 3 White pillowcases
- 1 Black pillowcase
- Black and white fabric paint (I swear by Jacquard Neopaque, but any fabric paint should work fine)
- A paint brush (mine is size 2, you could go smaller, but I wouldn’t go any bigger)
- Printer paper
- A pen
- Transfer/tracing paper (I used the Saral sampler pack, found at my local Michaels)
- Tape (optional, not shown here)
We made our own blank pillowcases, and you can find my tutorial for that over at Please Excuse My Craftermath…. here. You could also just find some black and white ones at the store. Ours are 15×15 square throw pillows.
Step 1: Choose and print your cards
This is by far my favorite step, because it lets you play the game a bit. We decided to do 1 black pillow (that only required 1 answer) and 3 white pillows.
Pro tip: Just play a game and pick a set from that. Don’t try to go through the whole deck and pick the things that you think would make a great combo. We did that. It’s not as fun, and you end up being super critical of your choices. Plus, if you play the game, then you’ll always remember that game when you see your pillows!
Once you’ve got your cards chosen, it’s time to set up your file to print. In your document editing software, make sure to set the page layout to landscape. This will make the long edge your top and bottom. In Word, this option is under the “Page Layout” tab. Just click the “Orientation” button and choose landscape. I also set my margins to narrow to make the font as big as possible.
I used the Arial font at size 97. A little google-fu suggests that Helvetica Bold is a better match, if you want to go that way. For the font size, just go as big as you can without breaking up the words in weird ways. Bonus if you can get the line breaks in the same spot as the cards!
I also put a page break between each phrase so that I had separate pages for each pillow. In the case of the question, I had 2 pages. Once you’ve got your phrases typed up and formatted, go ahead and print them.
Step 2: Transfer the text
How many of you used tracing paper as a kid? I know I did! I can remember using my pencil to shade across the entire back of the sheet and transfer that way. Ah, to be a kid again. Well! Never fear! This step lets you do just that!
First, place the transfer paper (graphite side down) on your pillow.
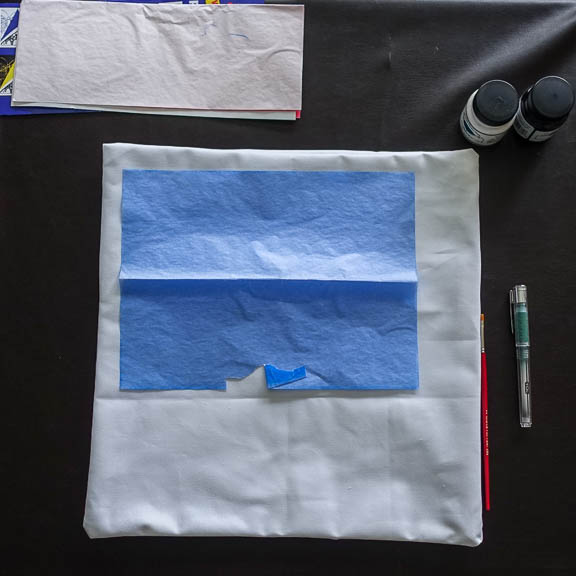
Then place your printed page right on top of that. You may want to use a small bit of scotch tape on the corners to keep it in place.
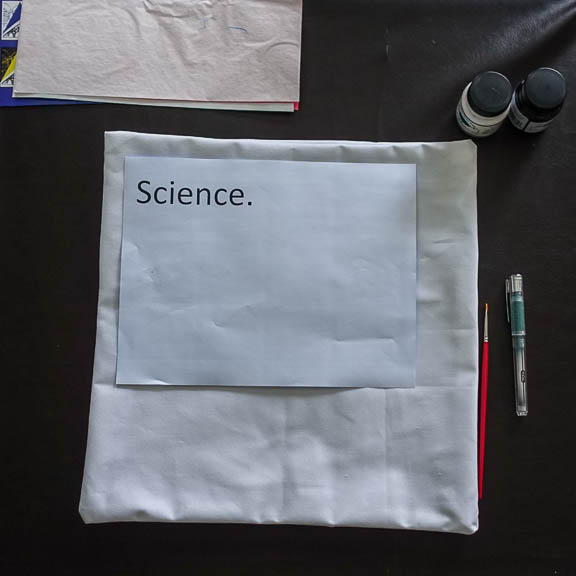
If you have 2 pages, don’t worry – you can just line them up. Make sure to put enough tracing paper below them.
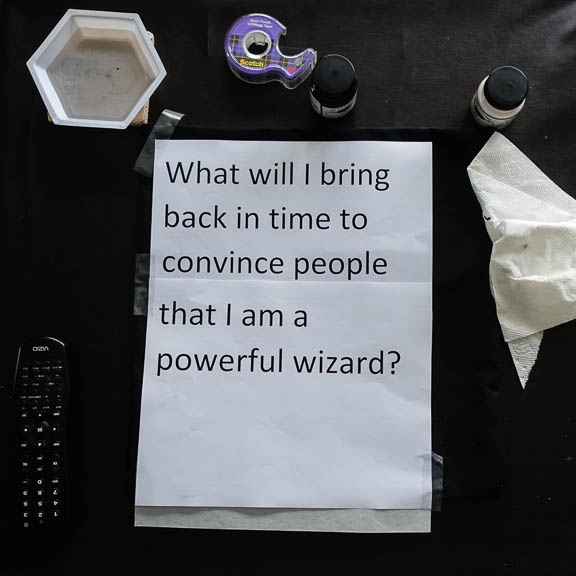
Now just trace around the outside of the letters with your pen, just like when you were a kid. You’ll end up with an outline of your letters on the pillow.
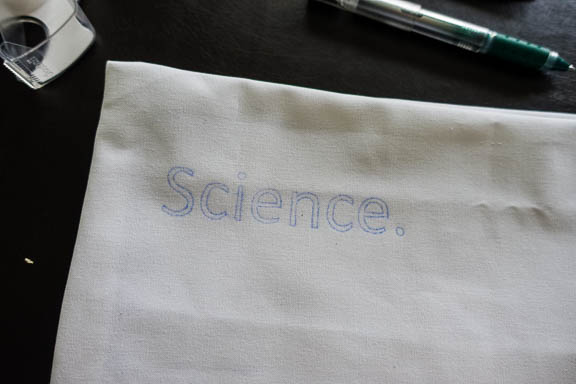
And just in case you’re wondering, yes! The blue will show up on the black pillows! The transfer material rubs off easily, so don’t worry if you go out of the lines or have a few splotches.
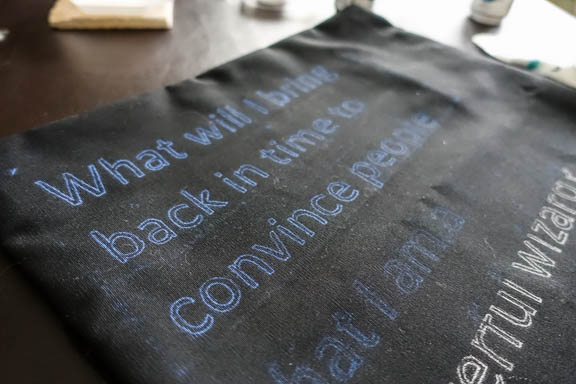
Step 3: Paint!
Ok, break out your paints and brush, it’s time to fill in the outline! You may want to put the paper or a piece of cardboard inside the pillow case to prevent bleed through. I didn’t have any problems, but it’s always best to be safe rather than sorry! This part requires a steady hand, but it doesn’t need to be perfect to look great.
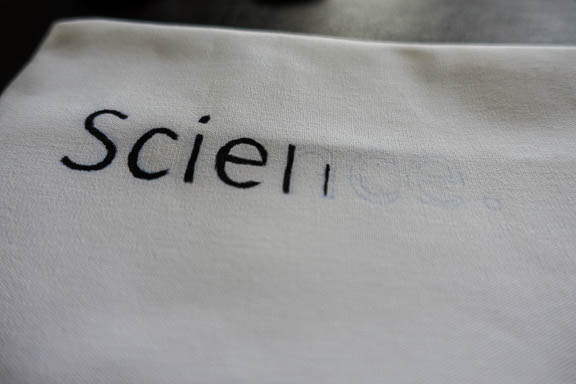
Once you’re done, it’s a good idea to heat set your paint by pressing it with an iron. This is usually done at the cotton setting, but check your paint’s directions and don’t go higher than the material you’re using. (e.g., if you’re doing silk pillows, the cotton setting will burn your material.)
That’s it!
I love these pillows so much! I want to make a bunch of them and just switch out the phrases periodically. Plus, it’s just fun to say “Could you please pass me A sweet spaceship?”. Don’t you think?
Thanks to Our Nerd Home for letting me guest post!
~Kristy gd from Please Excuse My Craftermath…

 Karen Marie Kedzuch says
June 4, 2015 at 10:46 pmWelcome Kristy to your Our Nerd Home,
Great project Kristy I am glad to see you will be sharing your talents once a month on this wonderful blog.
Happy Creating,
Karen Marie
 Lisa says
June 6, 2015 at 6:42 amThis is such an awesome project! I take photos of some of the more memorable CAH hands when my friends and I play … I think any pillows made from those would need to be put away when the rellies visit though! ~___^