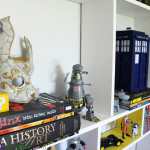
When we needed ways to display/store A LOT of stuff in our new home, we assessed our previous storage pieces – two medium IKEA Expedit shelving units and 2 IKEA Kilby bookcases. They were mismatched and pretty beat-up, but between them they could hold hundreds of Transformers, Star Trek figures, LEGO minifigures, graphic novels, books, and random other bits of geekery.
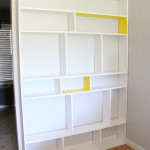
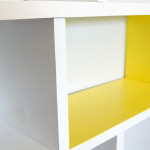
Despite our old shelves being functional enough, we wanted something more streamlined. After painting our new living room walls a light grey, we began work on a “built-in” bookcase. We’ve never done anything like this before, but it was surprisingly easy, cheap, and quick. The entire thing was assembled, attached to the wall, and painted (white to match the crown moulding, with a couple of yellow accent areas) within a few hours. Eventually we may extend the shelves to the other side of the wall, but for now this works perfectly for our needs. I should note that the original plan was to extend the shelf all the way to the ceiling for a more true built-in look, but at the last minute we decided to leave the top open (for now. We may change that later).
(Sorry about the complete lack of “during” photos – we did this project before we knew we would be blogging about it! We’re learning)
WOOD NEEDED:
*This is based on the exact size of our wall, at 7′ x 4’10”. Adjust sizes to your specific needs.
- 3 Eight foot 1×8 boards
- 4 Ten foot 1X8 boards
OTHER SUPPLIES:
- Power drill
- Level
- Pencil
- Metal brackets
DIRECTIONS:
The bookcase we built was 7 feet by 4 feet, 10 inches. The instructions consist of two easy parts. 1. Build the frame and 2. Build and Stack the Shelves
1. Build the Frame.
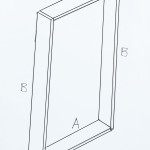
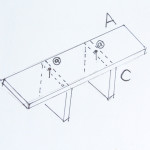
There are two parts to this frame, the height (B boards) and the width (A boards). Make sure to screw the B boards to the outside of the A boards, since all of your shelves will be the A board length. For our bookcase the B boards are 7 feet and the A boards are 4 feet, 10 inches. Build the frame with it lying down on it’s back. The 10′ boards were able to make 2 shelves (A boards) each. Two of the 8′ boards were used for the B boards, with the leftover 12″ used as supports (C). The third 8′ board was used for the remaining supports.
2. Build and Stack the Shelves
Stand your frame up.
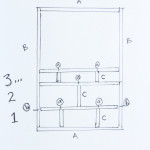
All of your shelves will be A boards. The support for each shelf is the C board. If you have more than one C board per level, just make sure they are the same height.
Stack your shelves (A) first into the frame, placing the supports (C) where you’d like them to end up. We went for a staggered look, but you could go more symmetrical if that’s your thing. Mark on the wood with a pencil where the shelves and supports will need to be connected, and also number your shelves so that you remember which order they go in. Remove the shelves.
Starting with Shelf 1, line up your pencil marks and screw the C boards to your A board at (a). Place the shelf into the frame and screw in at (b). Repeat with Shelf 2 and so on. Your level is your friend! Don’t screw anything in until it is level.
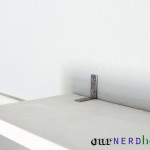
That’s it! Once all of your shelves are in place, paint the bookcase and place it into it’s new home. Make sure to add metal brackets at the top to secure the shelf to the wall. Depending on how load-bearing your shelves will be, you could also add some metal brackets to other areas, for reinforcement.
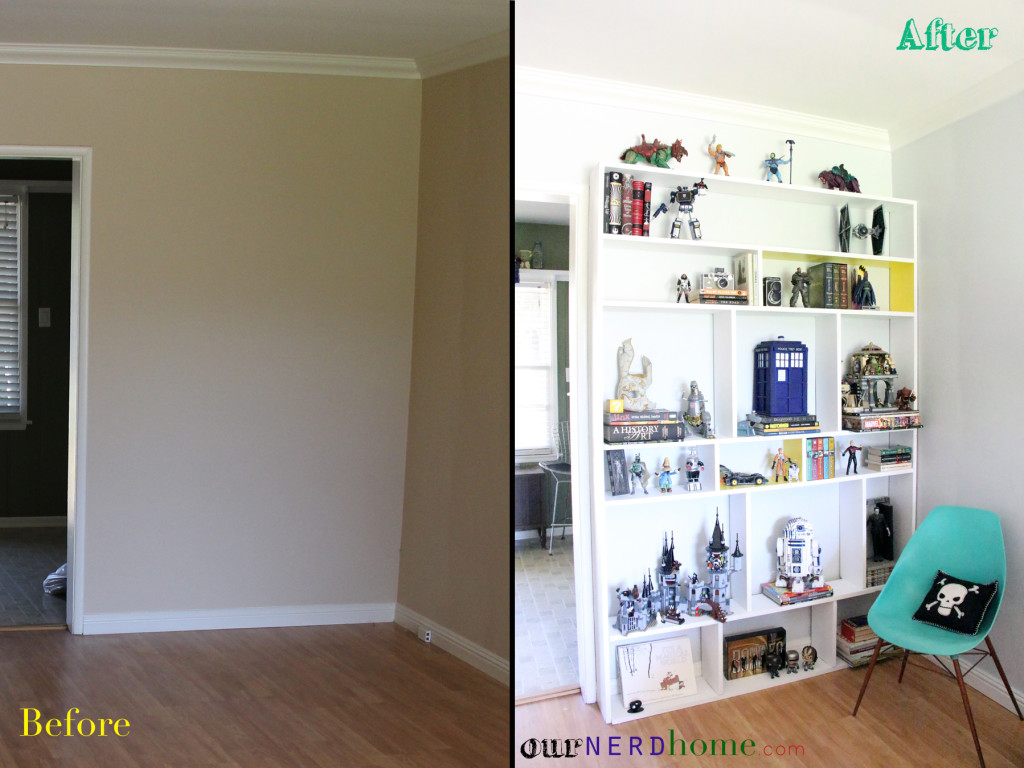
Here is our living room wall before, and after.

 Mamama' says
September 2, 2013 at 2:25 pmLove the bright yellow accent paint! Soooo unique….and makes the whole piece special!
 annagailey says
February 8, 2014 at 8:36 ammy husband and I have been searching the interwebs for an idea of how to display all our Lego creations. Now, I think I may have just found a way.
Thanks for the great tutorial!
 ournerdhome says
February 10, 2014 at 11:23 pmYou’re welcome! Let us know if you end up building one. 🙂
 beth says
May 2, 2014 at 2:36 amGreetings from Nashville. Love the book case. If you want it to be taller you could just rehang it off the floor. That would give you height and your pretty baseboard molding would show. That would allow displaying on the floor. It would look suspended, very modern. Thanks for sharing your home.
 brittanyssp says
June 3, 2014 at 11:56 amLove it, my hubby is supposed to be building me a bookcase for my birthday so I will have to show him this. You said cheap- may I ask the cost?
 ournerdhome says
June 3, 2014 at 12:12 pmNot sure what the cost was last summer, but we used ten foot and eight foot common boards. The lumber prices out to around $70 dollars on the Home Depot website today, plus the brackets and paint will run another $10-$12. So if your hubby wanted to build a bookcase exactly like ours, it will cost around $80. That cost may fluctuate depending on the size and specs of your bookcase.
Hope that helps and please send pics of the final project!
 brittanyssp says
June 3, 2014 at 12:49 pmGood to know, thank you! I will definitely come back & post a link once I can convince him to do it 🙂
 Stephanie says
August 25, 2014 at 3:31 amVery easy and deceptively simple! It looks so much harder and more costly. A must try!
 chris3o12 says
January 15, 2016 at 2:04 pmHi, may I just ask – did you reuse the Expedit and Kilby shelves or did you build your case from scratch?
Looks SO cool though! 🙂
 ournerdhome says
January 30, 2016 at 6:14 pmHi! We built it from scratch, just using basic boards from the home improvement store.